by Tim "Tooth Protector" Warner (timandsusan2002 at earthlink dot net)
This tutorial will get you up and running in no time flat, playing games from a variety of different gaming platforms on your Microsoft Windows-based computer by using the outstanding Multiple Emulator Super System (MESS) emulator. In this tutorial, we are going to focus on learning to play GCE Vectrex games by using MESS. However, the procedures outlined in this tutorial apply to any of the game platforms that are supported by MESS.
To play GTE Vectrex games on your PC by using MESS, you'll need the following files:
Visit the following Web site to download the latest version of MESS:
http://www.mess.org/download.html
Visit the following Web site to obtain Vectrex (and other) MESS BIOS ROMs:
http://www.geocities.com/messroms/
Note that you must have the appropriate BIOS ROM image for any game system that you want to access with MESS.
Visit the following Web site to download Vectrex screen overlays:
http://gothmog.homeip.net:8000/
Visit the following Web site to download Vectrex game ROMs:
http://www.classicgaming.com/vault/vectrexroms.shtml
Of course, judicious use of Google or one of the myriad peer-to-peer file-sharing applications should get you where you need to be as regards obtaining BIOS ROMs and game ROMs.
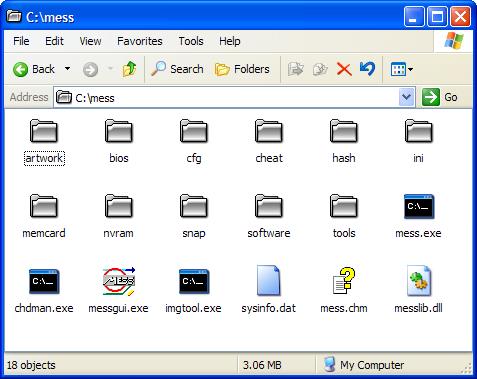
Your first step is to use WinZip or some other ZIP file-management utility to unpack all of your files. Begin by creating a folder named MESS on your hard drive and unpacking the MESS emulator files into it. After the file extraction your MESS folder should look something like the following:
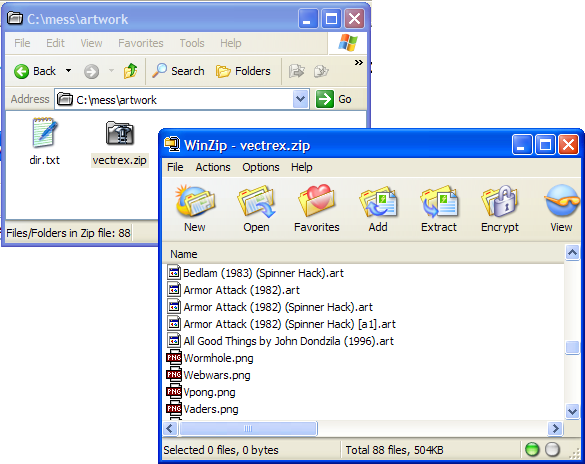
Next, you'll want to place your ZIPPED Vectrex BIOS ROM in the \MESS\BIOS folder. Note that the actual BIOS ROM (which in the case of Vectrex is actually called SYSTEM.IMG) must remain in your VECTREX.ZIP archive file.

Place your overlay files into the \MESS\ARTWORK folder. The VECTREX.ZIP overlay archive file that you downloaded earlier should remain zipped and placed, whole and entire, into the appropriate folder.
Finally, place your Vectrex game ROMs into the \MESS\SOFTWARE folder.

To begin, open your MESS folder and double-click MESSGUI.EXE to start up MESS.
If you are wondering: Where are my systems? Where are my game ROMs? then don't worry about it too much. We have to instruct MESS as to where everything is. That's what we will do now.
First, let's point MESS to the location of our ROM BIOS files. From MESS, click Options => Directories. In the Directories dialog box, select BIOSses from the Show directories for: drop-down list box. Although there may already be an entry in the Directories list named BIOS, I tend to favor manually selecting the appropriate folder anyway. Therefore, select whatever entry appears beneath Directories and then click Browse.
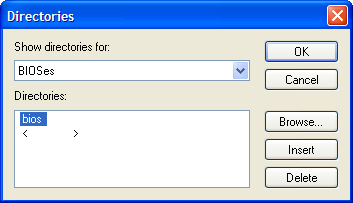
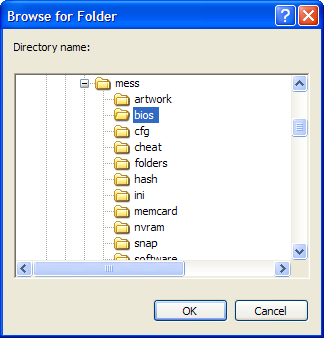
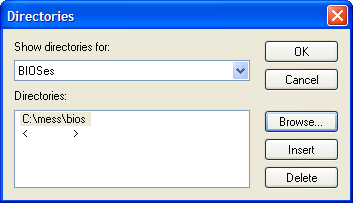
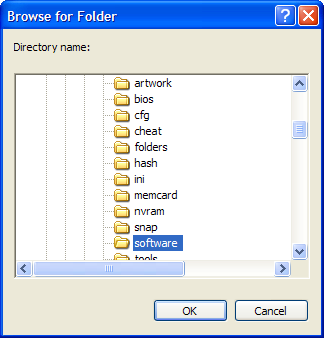
In the Browse for Folder dialog box, browse to the location of your \MESS\BIOS folder and click OK. You should now have a valid path configured for the BIOSes section of the Directories dialog box.
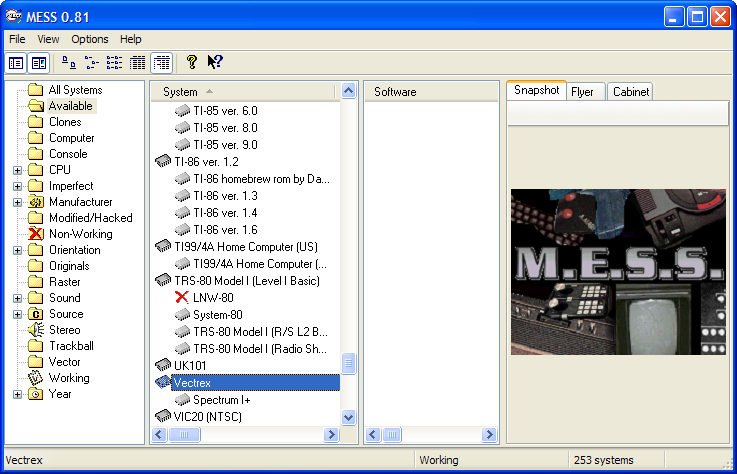
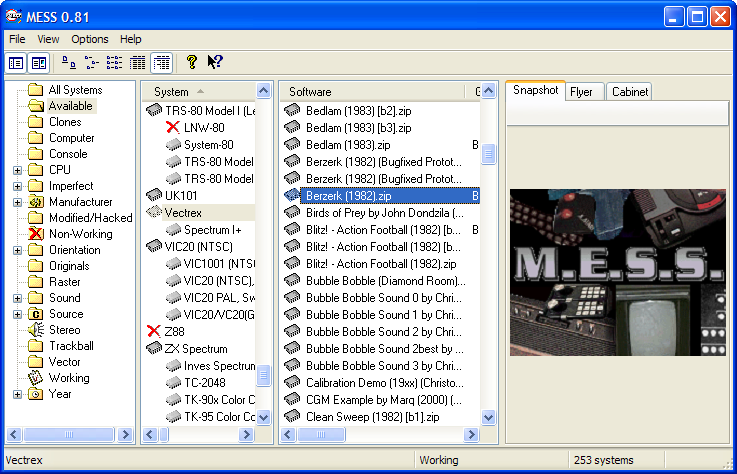
Click OK in the Directories dialog box to return to MESS. In the left-most pane, click Available to display your list of available emulators. You should see an entry called Vectrex. If not, then click All Systems in the left-most pane and select Vectrex in the System pane. To refresh the display, press F5 or click View => Refresh.
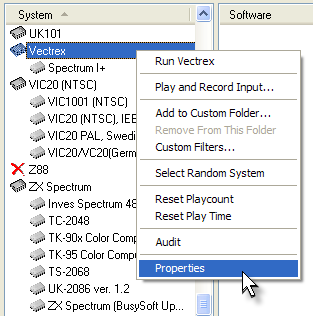
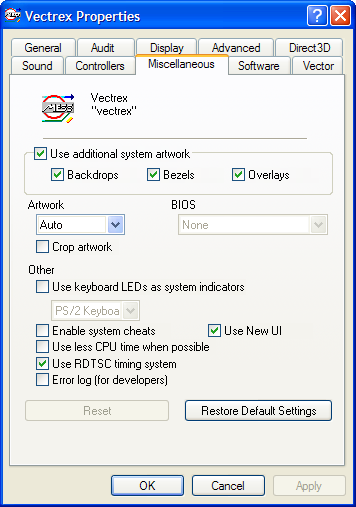
Right-click the Vectrex icon in the System list and select Properties from the shortcut menu.
In the Vectrex Properties dialog box, navigate to the Software tab. Next, click Browse.
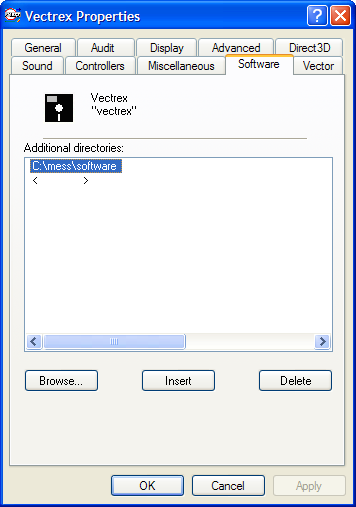
What we are going to do now is to point MESS to the location of our Vectrex game ROM files. In the Browse for Folder dialog box, browse to the location of your \MESS\SOFTWARE folder, select that folder, and then click OK.
You should now see the correct directory path in your Vectrex Properties dialog box. Click OK to return to MESS.
Yes, yes, I know: we can globally specify the location of the SOFTWARE folder by clicking Options => Directories, choosing Software in the Directories dialog box, and browsing to the location of the \MESS\SOFTWARE folder. However, in my experience this procedure fails to make the Vectrex ROMs appear in the Software list in MESS. So now you know two ways to do basically the same thing.
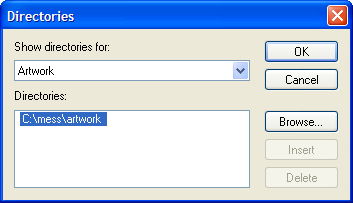
One more thing before we get to playing games--we should specify the location of our ARTWORK folder; the ARTWORK folder is the folder that contains our overlay files. From MESS, click Options => Directories, and then, in the Directories dialog box, select Artwork from the Show directories for: drop-down list box. Use the Browse button to specify the location of your \MESS\ARTWORK folder. Click OK when you are through in the Directories dialog box to return to MESS.
Although I'm not going to go into all available configuration options in this quick-start guide, you can tweak all sorts of other Vectrex-related emulation settings by right-clicking the Vectrex icon in the System list in MESS, selecting Properties from the shortcut menu, and then navigating to each of the tabs in the Vectrex Properties dialog box.
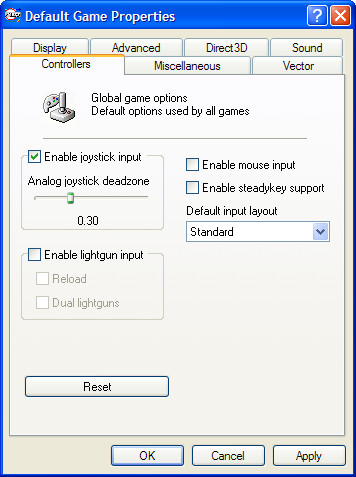
Global options that affect all systems can be configured by clicking Options => Default System Options.
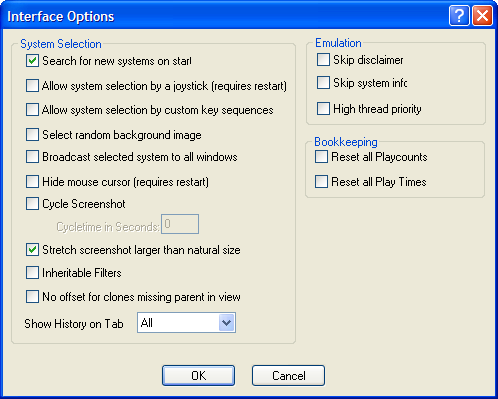
By clicking Options => Interface Options, you can control a variety of global configuration settings. Of special note are the check boxes in the Emulation section; enabling these options allows you to bypass the introductory screens and run MESS at a higher thread priority.
To play a Vectrex game in MESS, simply select Vectrex from the System list and then double-click the desired game title in the Software list in MESS.
Press any key at the first screen to continue.
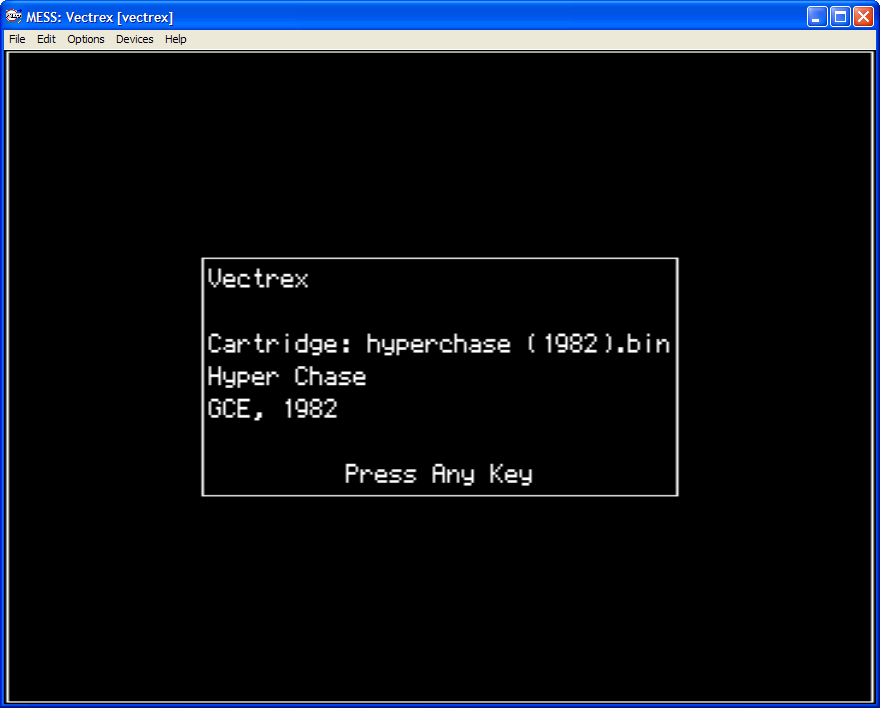
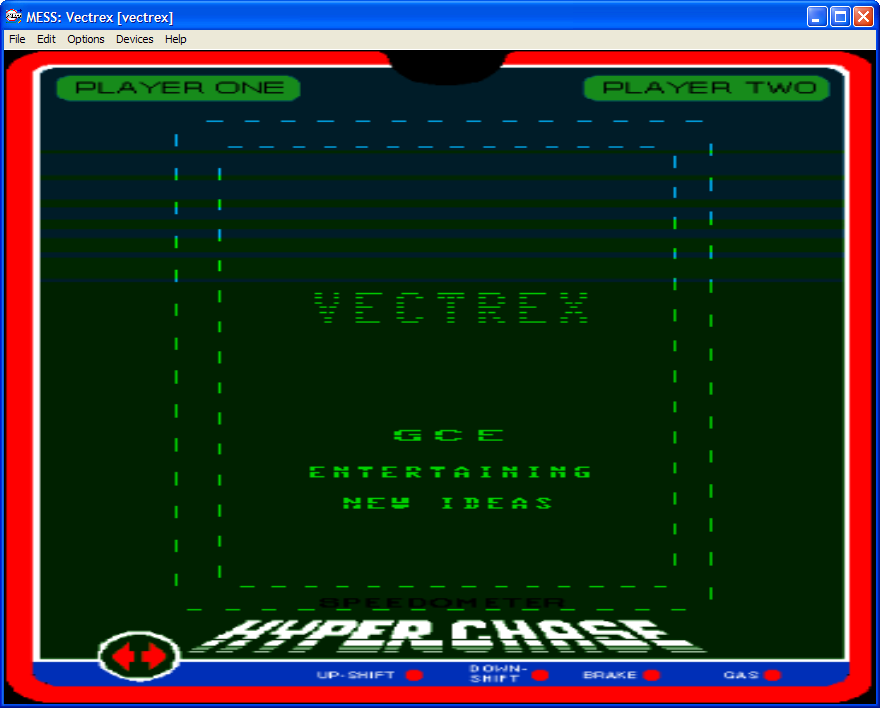
Here is the Vectrex title screen:
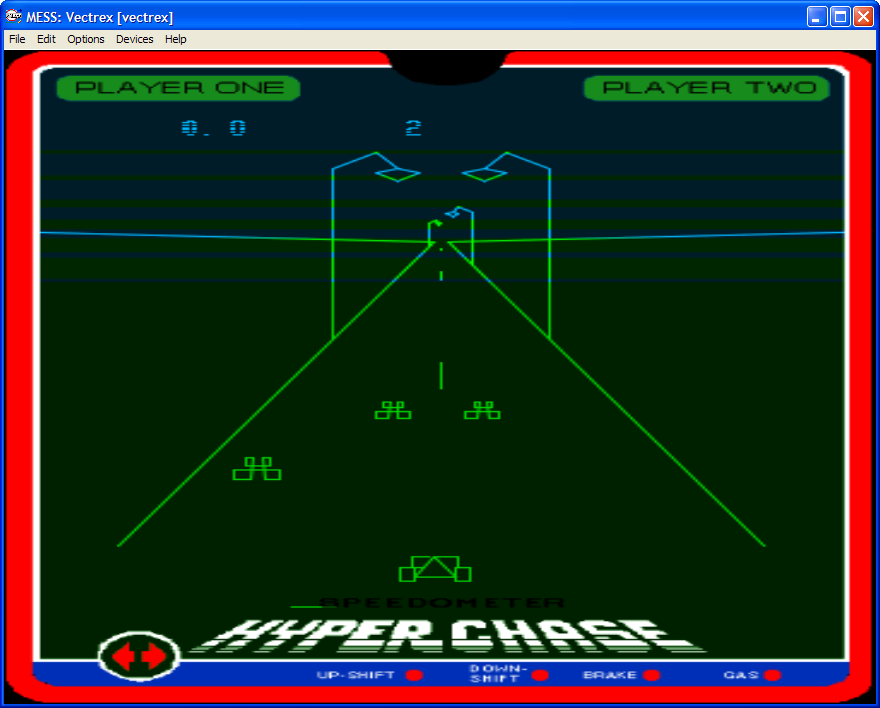
You'll find that gameplay begins immediately. Following is an in-game screen from Hyperchase:
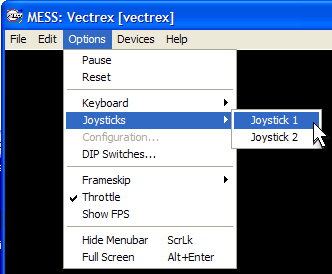
In terms of controlling the action, click Options => Joysticks => Joystick 1 from the MESS game interface menu bar.
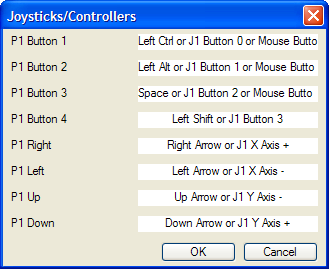
In the Joysticks/Controllers dialog box you'll see the default keyboard mappings. To change a mapping, simply click your mouse in the appropriate text box and press the new key. Click OK to return to the game.
In case you didn't know this already, MESS is based upon the Multiple Arcade Machine Emulator (MAME). Therefore, for most systems interface controls can be re-mapped either globally or on a per-game basis by pressing TAB during gameplay. However, this feature does not appear to work with Vectrex games.
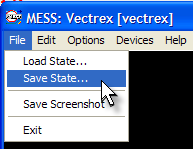
Regardless of whether you are playing your Vectrex game in a window or in full-screen mode, you have access to a menu bar. One really neat thing you can do with MESS that you never could have done with Vectrex hardware is to save your game progress. To save your game progress, simply click File => Save State....
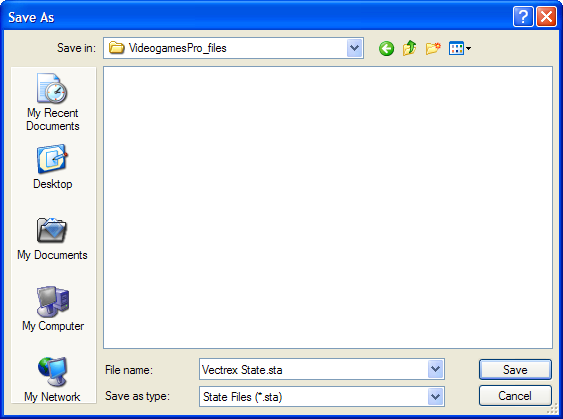
In the Save As dialog box, navigate to where you want to save your save-state file, name it, and click Save. The file will be saved with the .STA extension.
You can use the File => Load State command to load a saved game state. (Make sure to load the appropriate game ROM before you attempt to load a save state.)
Well, that's about all there is to it. I hope that you found this tutorial helpful. Happy gaming!